Source:https://thetuner.co.uk

You mash the accelerator pedal down to pass a slow-moving semi on a two-lane highway. There is a agonizing two-second pause while the engine hesitates, downshifts lazily, and slowly wakes up. You know your car has a turbocharger under the hood and a factory rating of over 200 horsepower, but it feels strangled, sluggish, and restrained.

That is because it is. Modern car manufacturers intentionally detune engines at the factory to account for poor fuel quality across global markets, neglected maintenance, and strict regional emissions regulations.

In my 10-plus years of flashing software maps, spending late nights over dyno runs, and diagnosing engine management systems, I have seen driver after driver unlock hidden performance lying dormant inside their engine control units. But if you start researching how to unlock that hidden power, you will immediately run into two terms tossed around interchangeably: ECU tuning vs remapping.

Are they the exact same thing, or is one method better for your daily driver? In this deep-dive guide, we will break down the crucial distinctions, technical mechanics, performance benefits, and real-world risks so you can make the smartest choice for your vehicle.

The Digital Brain: What Is an ECU?

Before diving into the software tweaks, we need to understand what controls your engine in the first place. The Engine Control Unit (ECU) is the master computer responsible for running your vehicle’s engine.

The Head Chef & Recipe Book Analogy

Think of your engine like a high-speed commercial kitchen:

  • The Engine Hardware (pistons, valves, turbocharger) are the cooks line and stoves.

  • The ECU is the strict Executive Head Chef supervising every millisecond of operation.

  • The Software Map is the Head Chef’s exact recipe book.

The recipe book dictates precisely how much fuel to inject, when to spark the ignition plug, how much boost pressure the turbocharger generates, and what air-to-fuel ratio (AFR) to maintain. If you want a different meal—or a faster car—you have to rewrite the recipe book.

+-------------------------------------------------------------------------+
|                  HOW THE ENGINE CONTROL UNIT OPERATES                   |
+-------------------+--------------------+--------------------------------+
| Engine Sensors    | ECU Processing     | Actuator Actions               |
+-------------------+--------------------+--------------------------------+
| • Mass Airflow    | Evaluates lookup   | • Fuel Injector Pulse Width    |
| • Crankshaft Pos  | tables (3D maps)   | • Ignition Spark Timing        |
| • Manifold Pressure| in real time       | • Wastegate Duty (Turbo Boost) |
| • Knock Sensors   |                    | • Throttle Body Angle          |
+-------------------+--------------------+--------------------------------+

ECU Tuning vs Remapping: Clearing Up the Confusion

While enthusiasts and shade-tree mechanics often use these terms as synonyms, in professional automotive circles, they represent two distinct scopes of modification.

What Is Remapping? (Software Refinement)

Remapping (often called ECU flashing or Stage 1 tuning) is the process of replacing or overwriting the factory software file stored in the ECU’s read-only memory (ROM) with a modified calibration map.

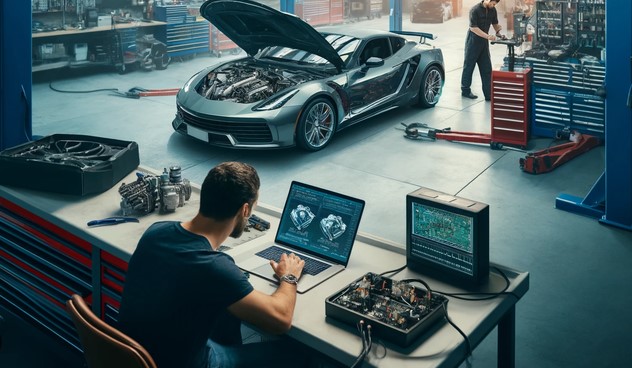
Technicians connect a laptop directly to your car’s OBD-II port (On-Board Diagnostics) using specialized hardware and write a pre-tested, optimized software file into the computer. You are not changing any physical engine parts; you are simply giving the factory hardware a better set of instructions.

What Is ECU Tuning? (The Broader Spectrum)

ECU tuning is the overarching umbrella term that encompasses all methods of modifying engine management logic—including remapping, but going far beyond it.

Tuning includes custom live dyno calibration, standalone engine management systems (like Haltech or MotEC), piggyback controllers (like the JB4), and physical engine hardware upgrades paired with bespoke software tweaks.

+----------------------------------------------------------------------------------------+
|                          ECU TUNING VS REMAPPING AT A GLANCE                           |
+----------------------+---------------------------------+-------------------------------+
| Feature / Aspect     | ECU Remapping (Flash Tuning)    | Full ECU Tuning (Custom/Standalone)|
+----------------------+---------------------------------+-------------------------------+
| Hardware Changes     | None required (Stock engine)    | Upgraded (Turbo, injectors, intake)|
| Installation Method  | OBD-II port software rewrite   | Live dyno session or piggyback|
| Customization Level  | Pre-configured Stage 1 / Stage 2| Bespoke cell-by-cell tuning   |
| Primary Goal         | Quick power unlock, everyday use| Maximum output, custom builds |
| Reversibility        | Easily flashed back to stock    | Complex; depends on hardware   |
+----------------------+---------------------------------+-------------------------------+

The Key Benefits of Modifying Your Engine Management

Why do millions of car owners choose to re-flash or tune their vehicles every year? When executed correctly by experienced calibrators, modifying your software unlocks several immediate driving improvements.

1. Significant Horsepower & Torque Gains

On turbocharged petrol and diesel engines, a simple software remapping can yield a 20% to 35% increase in horsepower and torque without changing a single bolt under the hood. The software increases turbocharger wastegate duty cycle (generating more boost pressure) and advances ignition timing safely.

2. Elimination of Throttle Lag & Flat Spots

Factory software maps often feature intentional lag built into the drive-by-wire throttle pedal to smooth out acceleration for casual drivers. Remapping sharpens pedal response, delivering instantaneous power delivery the moment your foot moves.

3. Improved Fuel Efficiency (Under Right Conditions)

It sounds counterintuitive, but a quality re-map can actually improve fuel economy by 5% to 10% during highway cruising. By optimizing air-fuel ratios and low-end torque delivery, the engine doesn’t need to work as hard or downshift as frequently to maintain cruising speeds.

Understanding Tuning Stages (Stage 1 vs. Stage 2 vs. Stage 3)

When shopping for tunes, you will inevitably hear about “Stages.” Here is what those industry terms actually mean in practice:

  • Stage 1 (Remap Only): Designed purely for stock vehicles. No physical hardware modifications are required. It yields dramatic gains on turbo cars with zero mechanical hassle.

  • Stage 2 (Hardware + Software): Requires light bolt-on modifications—typically a high-flow downpipe, upgraded intercooler, and a performance air intake—paired with a software map configured to utilize those freer-flowing parts.

  • Stage 3 (Full Build Custom Tune): Involves major mechanical changes like upgraded turbochargers, forged engine internals, high-flow fuel injectors, and a fully custom dyno calibration.

Expert Advice: Pro Tips & Hidden Warnings

As someone who has diagnosed melted pistons and dead ECUs from bargain-basement tunes, here is the unfiltered truth you need to know before modifying your car.

💡 Pro Tip: Prioritize Health Inspections Before Flashing

Never flash software onto an unhealthy engine! A map that increases boost pressure or advances ignition timing will instantly exaggerate pre-existing mechanical flaws. Before booking a tune, replace your spark plugs, install fresh ignition coils, check for vacuum leaks, and perform a compression test.

⚠️ The “Off-the-Shelf” File Trap & Warranty Voiding

Beware of cheap “handheld tuners” or shady shops loading unverified eBay flash files. Generic files often ignore knock sensor thresholds, running the engine dangerously lean to show high dyno numbers at the expense of engine longevity.

Crucial Warning: Modern dealerships use automated diagnostic scanners that detect modified ECU checksums—even if you flash the car back to “stock” before bringing it in for service. Expect your powertrain warranty to be flagged (TD1 code in Volkswagen/Audi group terms) if you flash your ECU during the factory warranty period.

Final Verdict: Which Route Should You Take?

Understanding the debate of ECU tuning vs remapping boils down to your performance goals and existing hardware:

  1. Choose Remapping (Stage 1 Flash) if your car is mechanically stock, you want an easy, cost-effective boost in daily driving performance, and you value the ability to revert back to stock software cleanly.

  2. Choose Full ECU Tuning if you are building a track car, installing heavy bolt-on performance parts (like bigger turbos or ethanol fuel setups), or requiring custom dyno calibration tailored specifically to your vehicle’s unique hardware.

Have you ever remapped or custom-tuned one of your vehicles, or are you considering flashing your daily driver? Share your engine setup, power goals, or troubleshooting questions in the comments below, and let’s keep the conversation going!

Source:https://rotinger.com

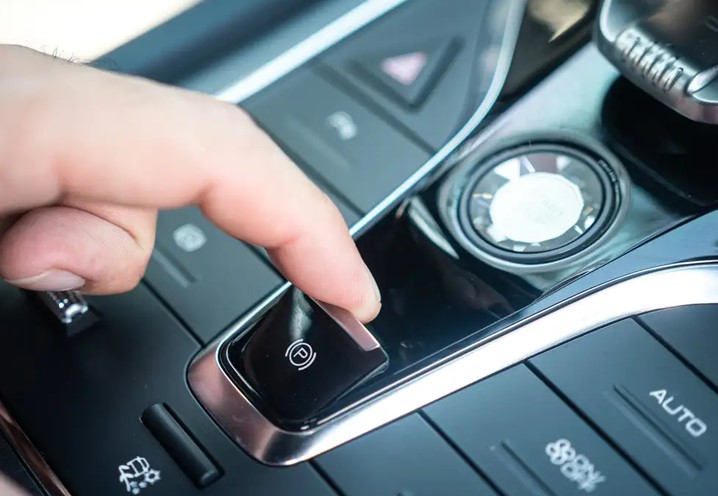
Imagine pulling up to a 30-degree incline on a steep garage ramp. You release the foot brake, reach for the center console, and instead of yanking a heavy mechanical lever until your shoulder clicks, you lightly flick a tiny plastic switch with your index finger. You hear a subtle high-pitched hum from the rear axle, and 4,000 pounds of steel lock dead in place—no rolling back, no muscle required.

In my 10-plus years of inspecting undercarriages, replacing worn calipers, and diagnosing tricky chassis electronics, I’ve watched the classic emergency brake lever virtually vanish from modern production lines. What replaced it is the Electric Parking Brake (EPB)—an electromechanical system that blends digital convenience with immense clamping force.

If you are looking to understand the top electric parking brakes dominating modern cars today—whether you’re buying a new vehicle, servicing your current ride, or curious about OEM upgrades—this deep-dive guide covers the best engineering options, how they operate, and real-world trade-offs you need to know.

How Electric Parking Brakes Work: The Tech Behind the Switch

To understand why carmakers abandoned steel cables for digital microcontrollers, let’s look under the floor pan. Traditional handbrakes rely on long steel cables that stretch over time, rust inside their rubber sleeves, and require manual adjustments at the lever console.

The Bicycle Brake vs. Hydraulic Press Analogy

Think of a traditional handbrake like a vintage 10-speed bicycle brake cable—it works fine until the cable stretches or slips out of alignment.

An Electric Parking Brake acts more like an automated hydraulic press attached directly to your brake rotor. When you pull the console switch, an Electronic Control Unit (ECU) sends a 12V signal directly to an electric motor mounted on the brake assembly. The motor turns a reduction gearbox, spinning a threaded spindle nut that forces the brake piston against the pads with precise, repeatable pressure every single time.

+-------------------------------------------------------------------------+
|                  HOW MOTOR-ON-CALIPER (EPB) OPERATES                    |
+-------------------+--------------------+--------------------------------+
| Electronic Switch | ECU Signal         | Actuator & Caliper             |
+-------------------+--------------------+--------------------------------+
| Driver pulls EPB  | CAN-Bus verifies   | Electric motor spins gearbox,  |
| console switch    | vehicle velocity   | driving spindle thread to clamp|
| (12V command)     | is zero (or safe)  | rear brake pads to rotor       |
+-------------------+--------------------+--------------------------------+

The 2 Primary Types of Electric Parking Brake Systems

Not all EPB setups are created equal. Manufacturers utilize two primary mechanical architectures across light-duty cars, heavy SUVs, and performance vehicles.

1. Motor-on-Caliper (Integrated EPB)

This is the modern industry standard used in over 80% of new passenger vehicles.

  • How it works: A small bidirectional electric motor and reduction gearbox sit bolted directly onto the rear brake caliper housing.

  • Pros: Completely eliminates mechanical cables, saves up to 13 lbs (6 kg) of vehicle weight, and integrates directly with modern electronic stability control (ESC) systems.

  • Cons: Makes rear brake pad changes impossible without entering a electronic “Service/Maintenance Mode” via diagnostic tools or dashboard menus.

2. Cable-Puller / Actuator EPB

An intermediate technology often seen on mid-2010s crossovers, luxury haulers, and truck chassis.

  • How it works: Instead of individual motors on each wheel, a single centralized electric motor unit mounts under the boot or chassis. This central motor pulls traditional steel cables attached to standard drum or disc parking brakes.

  • Pros: Allows car manufacturers to add electronic push-button parking without redesigning their existing rear brake calipers.

  • Cons: Still prone to cable stretch, rust, and cable binding over long winter seasons.

Top Electric Parking Brake Options & OEM Systems Evaluated

When reviewing the top electric parking brakes on the market, we are evaluating the engineering systems manufactured by major Tier-1 automotive suppliers that supply global car manufacturers.

1. ZF Friedrichshafen (ZF Motor-on-Caliper) — The Industry Pioneer

ZF invented the modern Motor-on-Caliper system in the early 2000s and has produced well over 250 million units globally.

  • Where You Find It: Volkswagen Group (Audi, VW, Porsche), BMW, Ford, Volvo, and Honda.

  • Why It’s a Top Pick: ZF’s system is legendary in workshop circles for long-term motor reliability, low power consumption, and instant engagement speeds. It seamlessly interfaces with Hill Hold Assist and Automatic Emergency Stop functions.

2. Continental Teves (EPB-Ci / Green Caliper) — Built for Electric Vehicles

Continental produces high-efficiency, lightweight integrated calipers designed specifically around the demands of modern hybrid and electric vehicles.

  • Where You Find It: Mercedes-Benz, Hyundai-Kia, Stellantis, and various EV platforms.

  • Why It’s a Top Pick: Continental’s latest “Green Caliper” designs significantly reduce residual brake drag—a common issue where pads lightly brush the rotor while driving—improving overall battery range and efficiency in modern EVs.

3. Brembo Sensify & High-Performance EPB — Precision for Sports Cars

Brembo takes parking brake engineering into the super-car and high-performance domain.

  • Where You Find It: Ferrari, Alfa Romeo, Cadillac V-Series, and high-end performance EVs.

  • Why It’s a Top Pick: Rather than looking like a utilitarian plastic unit, Brembo integrates sleek aluminum actuator housings directly into high-performance multi-piston rear calipers, keeping unsprung weight low while providing immense static clamping force.

Comparing EPB Systems: Features vs. Real-World Usability

+---------------------------------------------------------------------------------------+
|                    ELECTRIC PARKING BRAKE SYSTEM COMPARISON                           |
+---------------------+------------------------------+----------------------------------+
| Feature / Metric    | Motor-on-Caliper (e.g., ZF)  | Cable-Puller (Central Actuator)  |
+---------------------+------------------------------+----------------------------------+
| Mechanical Complexity| Low (No cables or levers)   | Moderate (Uses cables & linkages)|
| Weight Reduction    | High (Saves 10-13 lbs)       | Low                              |
| Brake Service Difficulty | Requires Diagnostic Mode| Standard (Manual retraction)     |
| Long-Term Durability| High (Weather-sealed unit)   | Moderate (Cables rust/stretch)   |
| Emergency Function  | Dynamic braking via ABS/ESC  | Cable tension pull               |
+---------------------+------------------------------+----------------------------------+

Expert Advice: Pro Tips & Hidden Warnings for DIYers & Drivers

Working on modern braking systems requires changing old mechanical habits. Here are two essential insights straight from the repair bay:

💡 Pro Tip: How to Change Rear Brake Pads on an EPB Car

Never force a rear caliper piston back with a C-clamp or pry bar on a Motor-on-Caliper EPB! Doing so will shatter the internal plastic reduction gear and ruin a $300+ caliper assembly.

Always put the braking system into Service / Retraction Mode first. This can be done using an OBD2 scan tool, or on many vehicles (like Ford, Mazda, and VW), through a specific dashboard button sequence that electronically rewinds the motor spindle inside the piston.

⚠️ The Dead Battery Trap

Because an EPB relies on 12V electrical power to retract, a completely dead car battery will leave your parking brake locked in place.

If your battery dies while parked on a driveway, you cannot simply push the car or tow it with all four wheels rolling until you either jump-start the battery or manually unscrew the actuator motor from the back of the caliper. Keep a portable lithium jump starter in your trunk to avoid getting stranded!

Final Verdict: Why the Digital Handbrake Is Here to Stay

The shift toward the top electric parking brakes isn’t just about saving center console space for cup holders and wireless phone chargers. By replacing mechanical handbrakes with computer-controlled actuators, automotive engineers have unlocked crucial safety features—from automatic emergency stop backups to effortless hill-start assists.

While servicing these systems requires a bit more digital know-how, their reliability, weight savings, and weather-proof operation make them one of the best chassis upgrades of the modern automotive era.

What’s your preference—do you still prefer pulling a classic mechanical handbrake lever, or do you love the sleek convenience of the electric brake switch? Let me know your thoughts or drop your maintenance questions in the comments below!

Source:https://vogalarms.com

You walk out to your driveway on a freezing morning, mug of hot coffee in hand, only to find shattered glass glistening on the pavement and a gaping void where your vehicle used to sit. According to vehicle theft statistics, a car is stolen every few seconds globally, and standard factory immobilizers are no longer enough to stop modern tech-savvy thieves.

In my 10-plus years as an automotive technician and electrical specialist, I have traced countless spliced factory wires, fixed botched aftermarket installs, and configured advanced vehicle security systems. Traditional car alarms just make noise; modern smart car alarms send real-time alerts directly to your smartphone, track GPS locations, and allow remotely killing the ignition.

Learning how to install a smart car alarm yourself might seem intimidating with the messy nest of wires under your dashboard, but with the right preparation and methodical approach, it is a rewarding weekend project. This deep-dive guide breaks down the step-by-step process, essential tools, and critical wiring knowledge you need to upgrade your vehicle’s security safely.

Understanding Your Vehicle’s Brain: How Smart Alarms Work

Before stripping wire insulation, you need to understand how a smart security system interfaces with your car’s electrical architecture.

The Electrical Central Nervous System Analogy

Think of your car’s factory wiring harness like a human nervous system:

  • Sensors (Nerves): Door triggers, shock sensors, and tilt detectors feel external movement or intrusions.

  • Brain (Brainstem): The main smart alarm Control Unit (ECU) processes incoming signals.

  • Actuators (Muscles): Siren blares, parking lights flash, door locks actuate, and starter kill relays disable the ignition.

Standard aftermarket alarms act isolated, but a smart alarm uses a 4G LTE/GPS cellular module or a CAN bus interface to broadcast updates instantly to an app on your phone.

+-----------------------------------------------------------------------+
|                    SMART CAR ALARM ARCHITECTURE                       |
+---------------------+-------------------+-----------------------------+
| Component           | Primary Function  | Typical Wiring Location     |
+---------------------+-------------------+-----------------------------+
| Main ECU Module     | Central processing| Tucked deep behind dash     |
| Cellular/GPS Dongle | App communication | Top of dash (clear sky view)|
| Starter Kill Relay  | Intercept ignition| Steering column harness     |
| Dual-Zone Shock    | Impact detection  | Strapped to rigid column    |
| Sirens & Triggers   | Audible alerts    | Engine bay & door jambs     |
+---------------------+-------------------+-----------------------------+

Tools & Gear Required Before Starting

Never attempt automotive electrical work with household wire nuts and duct tape—I have seen too many vehicle fires started by lazy electrical connections. Gather these professional tools before starting:

  • Digital Multimeter (DMM): Essential for verifying circuit polarity and voltage. Never use a standard incandescent test light on modern CAN bus systems!

  • Wire Strippers and Ratcheting Crimpers: For clean, reliable connections.

  • Soldering Iron & Heat Shrink Tubing: The gold standard for permanent, vibration-resistant connections.

  • T-Taps or Poke-and-Wrap Tools: For tapping into signal wires safely.

  • Zip Ties & Tesa Wire Loom Tape: Keeps your installation tidy and looking factory-original.

  • Vehicle Wiring Diagram Chart: Sourced specifically for your car’s exact make, model, and year.

Step-by-Step Security Guide: How to Install a Smart Car Alarm

Take your time with this process. Disconnect the negative terminal of your car’s 12V battery before touching any major electrical harness to prevent short circuits or accidental airbag deployment.

Step 1: Map Out Wiring & Locate Harnesses

Remove the lower driver’s side dashboard panel to gain clear access to the ignition harness, body control module (BCM), and kick panel wiring.

Using your vehicle-specific wiring chart, locate the five core wires you will need to splice or tap:

  1. Constant 12V Power: Unswitched battery power to run the alarm module.

  2. Switched Ignition 12V: Powers up only when the key is in the “RUN” position.

  3. Chassis Ground: Provides a solid electrical ground return path.

  4. Door Trigger Wires: Detects when doors swing open (can be positive or negative switching).

  5. Parking Light Wire: Flashes exterior lights when armed/triggered.

Expert Insight: Always verify wire functions with your digital multimeter. Turn the ignition key to ON—if your meter reads 12V DC on key turn and drops to 0V when key is OFF, you have successfully verified your Switched Ignition wire.

Step 2: Mount the Siren and Run Wires Through the Firewall

Mount the high-decibel siren under the hood in the engine bay, angling it downward so water cannot pool inside the horn. Find a factory rubber grommet in the firewall to pass the siren’s positive wire into the interior cabin. Avoid drilling new holes in the firewall unless absolutely necessary, and always use a rubber grommet to protect wires from sharp metal edges.

[Siren in Engine Bay] 
         │
         ▼ (Siren Positive Wire)
[Firewall Rubber Grommet] 
         │
         ▼
[Smart Alarm ECU under Driver Dash] ◄── [Constant 12V / Ground / Ignition]

Step 3: Install the Starter Interrupt (Kill Switch Relay)

One of the most effective anti-theft mechanisms in a smart alarm is the starter kill.

  1. Locate the vehicle’s Starter Wire under the steering column harness (this wire energizes only when cranking the engine).

  2. Cut the factory starter wire in half.

  3. Connect the key side to the input terminal of your relay, and the starter side to the output terminal according to your alarm’s wiring schematic.

  4. When the alarm is armed, the relay stays open, preventing current from ever reaching the starter motor even if a thief hotwires the ignition.

Step 4: Wire Door Locks, Sensors, and GPS Antenna

Connect the door lock and unlock control outputs from the smart alarm ECU to your vehicle’s door lock relay wires. Mount the shock sensor rigidly to a main steering column bracket using heavy zip ties—mounting it to loose wiring harnesses will dampen impacts and cause false alarms.

For the GPS and cellular antenna, position it high up under the top dashboard plastic. Avoid placing metal objects directly above the antenna to ensure a clear satellite signal.

Step 5: Test, Calibrate, and Pair the Smart App

Reconnect your main 12V vehicle battery terminal. Follow the system manufacturer’s setup sequence to pair the smart alarm brain with your mobile app via Bluetooth or cellular connection.

  • Test Door Triggers: Open each door while armed to confirm immediate mobile push notifications.

  • Calibrate Shock Sensor: Tap the windshield or kick the tires to adjust sensitivity thresholds—too sensitive and passing trucks will set it off; too dull and smashed glass won’t register.

  • Test Remote Ignition Disable: Attempt to start the engine while the alarm is armed to verify the starter interrupt engages properly.

Expert Advice: Pro Tips & Hidden Warnings

Over my years in the bay, these are two critical factors DIY installers frequently overlook:

💡 Pro Tip: Hide the Alarm ECU Like a Thief Is Watching

Lazy installers zip-tie the main alarm control module directly below the steering column where anyone looking underneath can instantly pull the main fuse. Tuck the main module high up behind the instrument cluster or deep behind the center console. Wrap the harness in black Tesa cloth tape so it blends seamlessly with original factory wiring.

⚠️ Beware of Factory CAN-Bus & Immobilizers

If your vehicle was built after 2005, simple wire splicing might trigger dashboard check engine lights or anti-theft system locks. Most modern cars require a CAN-bus Bypass Module (Data Interface) that communicates electronically with your key transponder chip. Attempting to bypass factory immobilizers manually without a dedicated data module can permanently lock your car’s factory ECU.

Protecting Your Investment with Smart Security

Learning how to install a smart car alarm takes patience, logical troubleshooting, and clean wiring practices. By integrating real-time GPS tracking, phone alerts, and starter kill relays directly into your car’s electrical system, you build a multi-layered defense system that deters both opportunistic smash-and-grab thieves and professional car thieves.

Take your time mapping out harnesses, solder your splices neatly, and test every circuit with a multimeter before closing up your dashboard.

Are you planning a DIY alarm install on your vehicle, or do you have questions about reading wiring schematics for your specific car? Drop your vehicle year, make, and model in the comments below, and let’s get your installation dialed in safely!

Source:https://www.humaxa.com

You are cruising down a highway at 65 mph on a rainy evening. Up ahead, a stalled car sits hidden around a blind bend without lights on. In a split second—before your eyes can even register the shadow—your dashboard flashes red, a sharp tone sounds, and the brakes apply themselves with surgical precision, bringing your car to a stop just feet from the bumper.

You didn’t react in time, but your vehicle’s onboard software did.

In my ten-plus years as an automotive specialist, diagnostic programmer, and vehicle inspector, I have transitioned from evaluating raw mechanical hardware like brake rotors and leaf springs to analyzing deep neural networks embedded inside electronic control units (ECUs). Over 90% of severe traffic accidents trace back to human error—distraction, fatigue, or delayed reaction times.

AI-powered car safety isn’t just about futuristic self-driving promises; it is actively quiet, vigilant technology operating inside modern passenger vehicles, saving thousands of lives every day.

What Is AI-Powered Car Safety? (Understanding the Core Technology)

To understand how modern artificial intelligence protects you on the road, it helps to strip away the marketing jargon. At its core, automotive AI transforms passive safety mechanisms (like seatbelts and airbags) into proactive digital co-pilots that anticipate danger before collisions occur.

The Human vs. Computer Vision Analogy

Think of traditional safety features like a blindfolded athlete relying solely on physical impact sensors to pop an airbag. AI safety features, by contrast, give the vehicle a pair of hawks’ eyes and an ultra-fast digital brain.

  • Computer Vision: High-definition cameras record the surrounding road, feeding raw video frames into Deep Learning algorithms trained on millions of miles of driving data. The system doesn’t just see a “shape”—it instantly categorizes it as a pedestrian, a cyclist, a road sign, or a stray dog.

  • Machine Learning: The engine doesn’t follow rigid code written by a programmer. Instead, it predicts real-time trajectory: “Is that pedestrian stepping off the curb into my lane, or standing still on the sidewalk?”

+-------------------------------------------------------------------------+
|                  HOW VEHICLE PERCEPTION PIPELINES WORK                  |
+-------------------+--------------------+--------------------------------+
| Sensor Data Inputs| Machine Perception | AI Action Execution            |
+-------------------+--------------------+--------------------------------+
| • Optical Cameras |                    | • Automatic Emergency Braking  |
| • Millimeter Radar| --> Sensor Fusion  | • Steering Adjustments         |
| • LiDAR Lasers    |     Engine (AI)    | • Pre-Crash Belt Tensioning    |
| • Ultrasonic      |                    | • Cabin Driver Warnings        |
+-------------------+--------------------+--------------------------------+

The Core Pillars of AI Car Safety Systems

Modern Advanced Driver Assistance Systems (ADAS) leverage artificial intelligence across three distinct zones: predicting external hazards, monitoring driver engagement, and processing multi-sensor data.

1. Sensor Fusion: Giving the AI 360-Degree Awareness

A camera can be blinded by direct glare from a setting sun. Radar can measure relative speed instantly, but struggles to read lane markings. LiDAR creates precise 3D spatial maps using laser beams, but can drop in resolution during dense fog.

In workshop tear-downs, I frequently inspect Sensor Fusion modules. This is the AI software layer that merges conflicting signals from cameras, radar, and LiDAR into one single, accurate model of the environment in real time.

Expert Insight: Early driver-assist features ran isolated sensor loops, resulting in frequent “phantom braking” events when a radar misread a overhead highway sign as a obstacle. Modern neural-network-driven sensor fusion filters out these false positives by cross-referencing visual cues with radar density data in milliseconds.

2. Autonomous Emergency Braking (AEB) & Pedestrian Detection

Next-generation Autonomous Emergency Braking (AEB) uses deep convolutional neural networks (CNNs) trained to spot edge cases—such as a child darting out from between parked vehicles at dusk. The system calculates the time-to-collision (TTC) continuously. If the driver fails to apply adequate pressure, the system pre-fills hydraulic brake lines and engages full stopping force automatically.

3. In-Cabin Driver Monitoring Systems (DMS)

Safety isn’t just about watching the road ahead; it’s about watching the person at the wheel. Driver Monitoring Systems (DMS) use near-infrared interior cameras focused on your face.

  • The AI monitors eye blink duration, pupil size, micro-expressions, and head position.

  • If the neural net detects signs of microsleep or prolonged phone distractions, it triggers audible alerts, seat vibrations, or visual warnings instructing you to pull over.

Levels of Vehicle Autonomy Explained

To understand where AI-powered car safety fits into vehicles on the road today, engineers classify automated driving into six levels set by SAE International.

+--------------------------------------------------------------------------------+
|                         SAE LEVELS OF DRIVING AUTONOMY                         |
+---------+--------------------+-------------------------------------------------+
| Level   | Classification     | AI Involvement Level                            |
+---------+--------------------+-------------------------------------------------+
| Level 0 | No Automation      | Zero AI intervention (Standard warning lights)  |
| Level 1 | Driver Assistance  | AI handles ONE task (e.g., Adaptive Cruise)    |
| Level 2 | Partial Automation | AI handles steering & acceleration simultaneously|
| Level 3 | Conditional Auto   | AI drives; human must take over when requested |
| Level 4 | High Automation    | AI handles full trip under set conditions       |
| Level 5 | Full Automation    | Human driver is optional; steering wheel absent |
+---------+--------------------+-------------------------------------------------+

Most modern vehicles in showrooms operate at Level 2 or Level 2+, meaning the AI assists with steering and speed control, but the human driver remains legally responsible for supervising the vehicle at all times.

Expert Advice: Pro Tips & Hidden Warnings

As someone who diagnoses these software-defined vehicles when things go wrong, here is practical advice every modern car owner needs to keep in mind.

💡 Pro Tip: Keep Your Windshield Clean and Unobstructed

The primary camera array for most modern ADAS and AI safety suites sits directly behind the top center of your front windshield. Dirt, dead bugs, heavy frost, or low-quality aftermarket glass tints can obscure the camera lens, causing the system to disable itself or misread road lanes. Wash that section of your glass regularly.

⚠️ Calibration Creep After Minor Repairs

If you get into a minor fender bender, hit a curb at speed, or replace your front windshield, your car’s AI sensors can become misaligned by fractions of a degree. A radar sensor angled down by just 1 degree will aim at the asphalt 50 feet ahead instead of tracking traffic. Always insist on a formal ADAS recalibration at a specialized shop after bodywork or glass replacement.

The Road Ahead: How AI Continues to Drive Safety Forward

We are rapidly moving toward an era where vehicles talk directly to one another (Vehicle-to-Vehicle / V2V Communication) and to municipal infrastructure (V2X). Imagine your car receiving an AI data packet from an intersection two blocks away warning that an oncoming driver just ran a red light—allowing your vehicle to pre-emptively slow down before you even enter the intersection.

AI is no longer an optional luxury add-on; it is becoming the core infrastructure of automotive engineering. While no technology can completely override the laws of physics, these intelligent systems drastically narrow the margin for human error, turning everyday vehicles into protective shields for drivers, passengers, and pedestrians alike.

Has an AI safety feature like Automatic Emergency Braking or Blind Spot Detection ever saved you from an accident? What AI tech do you want to see in your next car? Drop your thoughts or diagnostic questions in the comments below, and let’s discuss!

picture a freezing Tuesday morning at 5:30 AM on a remote job site. You turn the key on a truck loaded with 3,000 pounds of wet gravel and a 10,000-pound excavator on the trailer behind it. The engine sputters, coughs, and dies. In my 10-plus years as an automotive mechanic and fleet manager, I have seen that exact scenario melt down project schedules, drain bank accounts, and ruin reputations faster than a blown head gasket.

When you buy a work truck, you aren’t just buying transportation; you are buying a revenue-generating tool. A shiny paint job or a massive touchscreen won’t pull a stuck skid-steer out of deep mud. Through a decade of turning wrenches, managing commercial fleets, and diagnosing catastrophic failures on job sites, I have learned which manufacturers build true heavy-duty workhorses and which ones just pretend to.

If you are looking for the best work truck brands to power your business or personal tough jobs, this deep-dive guide breaks down the top reliable picks, key technical metrics, and real-world trade-offs you need to know before laying down your hard-earned cash.

What Makes a True Work Truck? (Understanding Core Metrics)

Before comparing specific badges, we need to clear up the jargon. Buying a work truck based solely on raw horsepower is like choosing a sledgehammer by how shiny the handle looks. Here are the core technical figures that actually matter on the job site.

Payload vs. Towing Capacity: The Tug-of-War Analogy

To understand the difference between payload and towing capacity, think of your truck like a human weightlifter:

  • Payload is how much weight the truck can carry on its own back (in the cab and bed).

  • Towing Capacity is how much weight the truck can pull behind it on a trailer.

Expert Insight: A truck might advertise a massive towing capacity, but if you fill the bed with heavy tools and seat four crew members, you consume part of your Gross Combined Weight Rating (GCWR). Overloading the bed compresses the rear suspension, lifting the front tires and severely compromising steering control and braking safety.

Gross Vehicle Weight Rating (GVWR) & Frame Rigidity

Gross Vehicle Weight Rating (GVWR) is the absolute maximum weight a vehicle can safely weigh when fully loaded with fuel, passengers, cargo, and tongue weight.

Underneath that sheet metal, the frame is the backbone of any work truck. Full-size commercial workhorses rely on high-strength, fully boxed steel frames or hydroformed rails that resist twisting under heavy cross-loads.

+-----------------------------------------------------------------------+
|                       WORK TRUCK CLASS BREAKDOWN                      |
+---------------------+-------------------+-----------------------------+
| Class Category      | GVWR Range        | Typical Uses                |
+---------------------+-------------------+-----------------------------+
| Light-Duty (1/2-Ton)| Up to 8,500 lbs   | Light hauling, contractors  |
| Medium-Duty (3/4-Ton| 8,501 - 14,000 lbs| Heavy equipment towing,     |
| to 1-Ton HD)        |                   | commercial upfitting        |
| Commercial Chassis  | 14,001+ lbs       | Dump beds, crane bodies,    |
| Cab (Class 4-6)     |                   | utility platforms           |
+---------------------+-------------------+-----------------------------+

Top Contenders: The Best Work Truck Brands Tested on the Job

Let’s dive into the core players that dominate North American job sites, analyzing their strengths, real-world reliability, and engineering philosophies.

1. Ford — The Undisputed Workhorse of the Fleet Industry

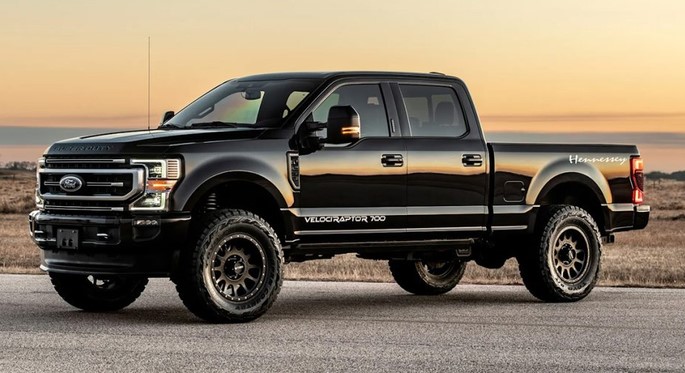
There is a reason Ford has maintained a stranglehold on the commercial market for decades. From the light-duty F-150 to the severe-duty F-250/F-350 Super Duty and chassis cab line, Ford designs vehicles specifically around fleet usability and upfit flexibility.

  • Key Strengths: High payload capacities thanks to military-grade aluminum-alloy bodies, widely available fleet parts, and flexible factory upfit wiring switches.

  • Standout Engine: The 6.7L Power Stroke V8 Turbo Diesel (delivering up to 1,200 lb-ft of torque) for extreme towing, or the 7.3L “Godzilla” Gas V8 for bulletproof, low-maintenance power.

  • Real-World Verdict: Having serviced hundreds of Super Duty trucks, I can tell you their high-strength steel frames tolerate extreme abuse. They are built for contractors who demand raw capability day in and day out.

2. Chevrolet & GMC (General Motors) — Unmatched Towing Torque and Durability

General Motors takes a precision engineering approach with the Chevrolet Silverado HD and GMC Sierra HD lines. Known for exceptional chassis dynamics and durable powertrains, GM trucks are staple sights in heavy construction, agriculture, and equipment transport.

  • Key Strengths: Exceptional directional stability when hauling heavy loads, smooth-shifting transmissions, and user-friendly trailering tech.

  • Standout Engine: The legendary 6.6L Duramax V8 Turbo-Diesel paired with the commercial-grade Allison 10-speed automatic transmission.

  • Real-World Verdict: The Duramax-Allison combo is arguably the smoothest heavy-towing powertrain on the highway. If your daily routine involves pulling heavy gooseneck trailers across mountain passes, GM’s powertrain management is hard to beat.

3. Ram — Heavy-Duty Pulling Power Meets Driver Comfort

Ram Trucks (formerly Dodge Ram) has carved out a massive segment among owner-operators and hotshot haulers who spend 8 to 12 hours a day behind the wheel.

  • Key Strengths: Industry-leading cabin comfort, smooth coil-spring or air-suspension options on select models, and low-end torque supremacy.

  • Standout Engine: The 6.7L Cummins Inline-6 Turbo Diesel.

  • Real-World Verdict: An inline-six engine configuration inherently possesses fewer moving parts than a V8, making the Cummins diesel engine legendary for long-term mechanical simplicity and extreme cylinder block longevity. If long-haul towing comfort is your top priority, Ram leads the pack.

4. Toyota — Legendary Reliability for Light to Mid-Duty Work

While Toyota does not compete in the heavy-duty Class 3+ commercial segment in North America, the Toyota Tundra and mid-size Tacoma deserve a special place among the best work truck brands for light-duty tradesmen, inspectors, and supervisors.

  • Key Strengths: Unmatched structural build quality, high resale value, and minimal unscheduled maintenance downtime.

  • Standout Engine: The i-FORCE MAX Twin-Turbo V6 Hybrid, offering punchy torque without requiring a massive V8 footprint.

  • Real-World Verdict: For plumbers, electricians, and independent contractors who do not need to tow 20,000 pounds, a Toyota pickup will routinely outlast almost anything on the road with basic oil changes and preventive maintenance.

Gas vs. Diesel: Choosing the Right Engine for Your Workload

One of the most frequent questions I receive from business owners is: “Should I buy a gas or diesel work truck?”

+-------------------------------------------------------------------------------+
|                         GAS VS. DIESEL COMPARISON                             |
+---------------------+--------------------------+------------------------------+
| Feature             | Gasoline Engine          | Diesel Engine                |
+---------------------+--------------------------+------------------------------+
| Initial Purchase    | Lower upfront cost       | $9,000 - $12,000 premium     |
| Low-End Torque      | Moderate                 | Massive (1,000+ lb-ft)       |
| Fuel Economy        | Lower under heavy loads  | Higher under heavy loads     |
| Maintenance Costs   | Standard / Inexpensive   | Higher (DEF, complex filters)|
| Best Suited For     | Short trips, stop-and-go | Heavy long-distance towing   |
+---------------------+--------------------------+------------------------------+
  • Choose Gas if: Your daily routes involve short trips, frequent stop-and-go driving around town, or payloads under 10,000 lbs. Modern big-block gas engines (like Ford’s 7.3L or GM’s 6.6L gas) offer low maintenance overhead without complex Diesel Exhaust Fluid (DEF) systems.

  • Choose Diesel if: You regularly tow over 12,000 lbs across long distances. Diesel engines deliver their maximum pulling power at low RPMs, reducing engine strain and offering superior exhaust braking on downhill grades.

Expert Advice: Pro Tips & Hidden Warnings Before You Buy

After inspecting hundreds of worn-out work trucks, I have compiled these critical insights that salespeople rarely mention on the showroom floor.

💡 Pro Tip: Inspect the Upfit & Frame Layout

If you plan to add a utility bed, snowplow, or ladder rack, verify the frame’s Cab-to-Axle (CA) dimension and factory wiring harness locations before buying. Custom fabrication work to relocate fuel tanks or brake lines can easily add thousands of dollars in unexpected body-builder labor costs.

⚠️ The Short-Trip Diesel Trap

Modern diesel engines rely on Diesel Particulate Filters (DPF) to trap soot. These filters require high exhaust temperatures during highway driving to clean themselves (a process called regeneration). If a diesel work truck is only driven on short 5-minute runs between local job sites, the DPF will clog rapidly, resulting in costly limp-mode repair bills.

Final Verdict: Which Brand Deserves a Spot in Your Fleet?

Selecting from the best work truck brands ultimately comes down to matching the vehicle’s engineering strengths to your daily operational reality:

  1. Pick Ford if you want an all-around commercial platform with flexible fleet management and top-tier payload capabilities.

  2. Pick Chevy / GMC if you prioritize rock-solid towing stability, smooth transmission performance, and high-tech trailering assistance.

  3. Pick Ram if long-haul comfort and the low-RPM pulling grunt of a Cummins engine are essential for your daily workflow.

  4. Pick Toyota if you need a bulletproof light-duty truck that virtually eliminates unexpected repair downtime.

What is your primary requirement for a work truck—raw towing capacity, long-term reliability, or driver comfort? Share your experiences or drop your fleet questions in the comments below, and let’s keep the conversation going!